There's a variety of options when it comes to treating your water on the trail. When choosing a method, you want to take into account the cost, added weight, efficiency, time it takes, and how much chemicals are involved. Here are a few popular options:
Many hikers choose not to treat their water at all. This saves on expenses and pack weight. While they are more susceptible to bacteria and viruses, they probably build some sort of immunity after a while. Plus, they aren't adding any extra chemicals to their bodies.
Boiling water is another option. You don't have to pay anything extra for a treatment system, but you're still purifying your water. This is a time consuming process, and it's probably not for you if you like to put in big miles daily. Also, this consumes precious fuel that could be used for cooking. However, if you don't mind building fires, then you can save your fuel supply.
Another option is the Steripen. It eliminates almost 100% of bacteria and viruses. It works by using ultraviolet light to make water safe to drink. It only takes about 30 seconds to a full minute (depending on how many liters of water you have) to sterilize your drinking water. You can spend anywhere from $60 to $120 on a Steripen, and the more lightweight ones do cost more. Also, they require Lithium batteries which are more expensive. I used my Steripen on a 3-week backpacking trip, and it broke on me. I don't know if this is the case for everyone, but the company is pretty good about replacing broken products.
Iodine tablets and chlorine are inexpensive and lightweight. They come in a small bottle and normally only cost about $10. They do discolor and add a weird taste to your water. You can solve this problem by either getting an additional bottle of taste-neutrailizer or adding Gatorade packets to your water. You will usually have to wait at least a half hour before your water is safe to drink. You can get these treatment systems at most athletic stores that have a camping section. Along a similar line, I have heard of people who add 2 drops of regular bleach to their water. I'm not sure how healthy this is for your body, but it can't be much worse than iodine.
Water filters are another option for water treatment. This method, unlike the others listed above, gets rid of debris so you don't have any dirt floating in your water. Water filters get rid of parasites and bacteria, but not viruses. It doesn't change the taste of your water either. When buying a water filter, you should consider how often it needs to be cleaned and how often the filter needs to be replaced. There's a variety of different brands to choose from, and the cost can run anywhere from $20 to $250. While there are lightweight filters available, for the most part this method adds the most weight to your pack.
Not one method is right for everyone. If you're not sure, I would choose the most inexpensive method to start with or buy the product second-hand. Then if you're not happy, you can choose a more expensive option.

Thursday, January 26, 2012
To Hike Alone or with a Partner
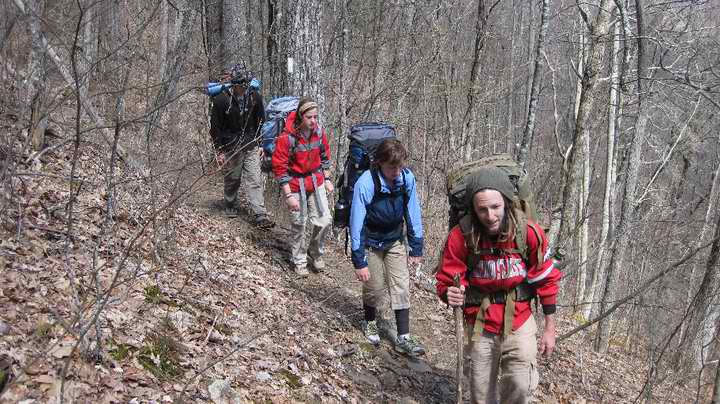 |
If you're planning on thru-hiking, chances are you won't be able to convince any of your friends to quit their jobs and come hiking with you. But who knows, you might get lucky. Having a hiking partner is great because you're never lonely, you have someone to help you with tasks, and you're family and friends at home don't have to worry about your safety so much. You guys can split the weight of gear, such as the tent, cooking stove, and data books. It saves time too; one person can fill up the water bottles while the other person sets up the tent. If you're thinking about hiking Southbound, the trail can get pretty lonely because most hikers choose to go Northbound. Having a partner will still give you the sense of solitude in the wilderness, but you'll still have a bit of company.
Solo hiking is a great experience too. You get to hike at your own pace, do as many or as few miles as you want, and you don't have to consult with anyone if you want to make a detour. You'll still meet awesome people on a daily basis because the trail is such a tight-knit community. It's also easier to plan your hike financially if you're hiking alone. If you have some extra money to spend, you can seek out the comforts of hostels and motels regularly. Or if you're on a tight budget, you don't have to feel guilty because your partner is missing out on that hot shower and nice meal that they wanted. Hiking solo also gives you a huge sense of independence and self-reliance. Not everybody has the will-power to go into the wilderness alone and do something as challenging as a thru-hike.
Even if you start a hike solo but really want a partner, the opportunity is still there. During the first few hundred miles, other individuals are also seeking companionship. This is a great time to find someone that shares your hiking style. But be careful not to jump into something permanent just because you're lonely. You don't want to end up with a hiking partner that annoys you. Hold out, and you can definitely find a hiking partner that you love having around.
The last, and in my opinion best, option is to have friends meet you on the trail for short periods of time. It's always a good time to get a taste of home. After hearing of your plans for a thru-hike, many of your friends will probably be curious about what it's like to spend some time on the trail. Maybe you can even convince your parents to join you for awhile. Not to mention, you friends will go home and tell stories of how awesome you are at building fires and locating water sources.
Regardless of if you decide to hike solo or with a partner, you'll find a feeling of camaraderie and a sense of kinship among fellow hikers. There's a saying on the AT: Instant family. Just add trail.
Thursday, January 19, 2012
Dehydrate Fruit and Vegetables in the Oven
It's difficult to get enough fruit and vegetables on the trail. They're very heavy to carry and bruise easily. However, if you dehydrate them ahead of time, they're awesome to have. You can snack on the fruit during the day. Veggies can be re-hydrated and cooked for dinner.
You can always buy dehydrated food in the store, but it will be expensive. There are also some great dehydrators that you can purchase. The cheapest method, however, is to dehydrate food in your oven.
Things you'll need:
 Step 1: Preheat oven to anywhere from 130-180 degrees. Rinse your fruit or veggies off in the sink. Then peel the skin off, and cut off any bruises. Slice into even sized pieces.
Step 2: Make a mixture of lemon juice and water. It should be about 1 part lemon juice to every 5 parts water. You're going to soak your fruit or veggies in this mixture for at least 5 minutes. I find it easiest to toss my veggies in as I cut them.
Step 3: Dry fruit or veggies off with a clean towel. Put a piece of parchment or wax paper on a baking sheet. Put the fruit or veggies on the baking sheet, but don't overlap. If you oven doesn't go as low as 180 degrees, you can stick a towel in the door so some of the heat circulates out.
You can always buy dehydrated food in the store, but it will be expensive. There are also some great dehydrators that you can purchase. The cheapest method, however, is to dehydrate food in your oven.
Things you'll need:
- your fruit or veggies of choice (apples, bananas, papayas, onions, potatoes, peppers, etc.)
- lemon juice
- an oven
- baking sheet
- parchment or wax paper
- a large jar
Step 2: Make a mixture of lemon juice and water. It should be about 1 part lemon juice to every 5 parts water. You're going to soak your fruit or veggies in this mixture for at least 5 minutes. I find it easiest to toss my veggies in as I cut them.
Step 3: Dry fruit or veggies off with a clean towel. Put a piece of parchment or wax paper on a baking sheet. Put the fruit or veggies on the baking sheet, but don't overlap. If you oven doesn't go as low as 180 degrees, you can stick a towel in the door so some of the heat circulates out.
 |

About & Contact

Megan loves photography, new gear, and hearty vegetarian meals. Her "I'm a real hiker now" moment came while sitting on top of Mt. Killington, drinking beer out of her cooking pot. Her other favorite trail memories are staying with a religious cult in Vermont, hitch-hiking 80 miles in a rainstorm with her friend Moonshine to retrieve the car, and reaching her first 100 mile mark on the trail. She hopes to inform people about trail life and to inspire others to grab their packs and head to the mountains.
You can contact her by email: meganmaxwell234@gmail.com
Tuesday, January 17, 2012
Gear Talk: Finding the Perfect Pack
Finding a pack that works for you is important. Hiking with a pack that's uncomfortable or the wrong fit, is going to make you feel miserable. If you're going to splurge on a piece of gear, this is it.
Other sources will tell you that you should purchase your pack at an outfitter, so you can try it on to make sure that it fits right and is comfortable. However, unless you live in an outdoor mecca, it's going to be difficult to find an outfitter with a wide selection of packs available. I would recommend going to an outfitter to find the right size and fit. Then you can order online if you like. At the very least, make sure you're ordering from a website that will allow you to make returns.
I'm pretty convinced that that I'll be purchasing the new Osprey Aura 65 for my thru-hike. In addition to the sleek look and pretty color options, this pack has some great features. While it comes in sizes from small to large, you can also adjust the harness and hipbelt to make a perfect fit. Osprey is also known for their extremely comfortable hipbelts. The downsize is that there isn't a pocket for large water bottles, so you either have to get a hydration reservoir or use smaller water bottles. Osprey packs are also more pricey, so you'll probably be spending between $200-$250.
http://www.ospreypacks.com/
Osprey has great customer service who know what they're talking about and seem to be real hikers.
Kelty is another reliable brand that has great packs. My first pack was a Kelty, and after 250 miles of hiking and a trip to England, I haven't had any problems with it. It's been comfortable, durable, and easily fits all of my gear. Kelty has a new Agile Series of packs that have great ventilation and suspension systems. You can easily store your hydration reservoir or use the large side pockets for your water bottles. The downside is that the harness isn't adjustable, so be sure to measure your torso length and check out the size chart before you order. Kelty is a bit more reasonably priced than the Osprey. You'll probably be able to find a great pack for around $150.
http://www.kelty.com/default.aspx
Kelty is another brand with great customer service from real hikers.
Another well-known brand is North Face. I've never actually met anyone who owned a North Face pack and was happy with it, but there are some great reviews online. Most North Face packs seem to have an adjustable harness and good ventilation on the back panel, which are great features. For the high price of these packs, I think they should be a little more lightweight. Prices range from $140- $270, so you can still shop in your price range.
http://www.thenorthface.com/en_US/index.html
Other notable brands are:
Gregory
Black Diamond
REI
If you're not set on a specific brand, and you just want to shop around and compare prices and styles, REI is also great for that along with Altrec and Backcountry. These websites offer great discounts, so you can find a pack priced anywhere from $80- $500.
Monday, January 9, 2012
What To Pack for the Trail
Packing for the AT might seem daunting at first. You're not completely sure of what items you'll need. Maybe you go overboard and pack anything that might seem mildly useful. Maybe in your desperation to have a low pack weight, you forget a few key pieces of gear. Well not to worry hikers. Here is your gear list of everything you need (and don't need) to hit the AT.
Let's remember two rules while we're packing:
1. If you're not going to use something everyday, you really don't need it.
2. Start with your three basic pieces of gear: pack, sleeping bag, and shelter. Build on from that.
Be sure your sleeping bag and tent are designed for backpacking, otherwise they'll probably be really heavy.
Other necessary gear:
-boots or hiking shoes
-bag to keep food in (something durable; you have to hang in up every night)
-sleeping pad
-water bottles or water bladder
-something to purify water with like iodine tablets, Aqua Mura, or a Steripen
-clothes (we'll cover what kind of clothes in a later post)
-stuff sack for clothes
-small first aid kit (nothing too fancy; unless your a doctor you probably won't be able to treat much more than scrapes)
-flashlight or head lamp
-data book
-camp stove and cooking pot
-lighter
-thin, light rope (to hang your bear bag)
Optional items:
-sandals to wear around camp
-pocket knife
-tarp
-toothbrush, deodorant, etc.
-journal
-camera
-bear Mace
-trekking poles
-trail mascot
-sunscreen
-tent repair kit
-needle and thread
Things to leave at home:
-gun (you really won't need it)
-machete (the trail is not overgrown)
-GPS (the trail is clearly marked)
-boyfriend (just kidding)
Subscribe to:
Posts (Atom)